
 Español
 русский
 Français
 Português
 Deutsch
 عربى
عربى italiano
-1.jpg)
Content
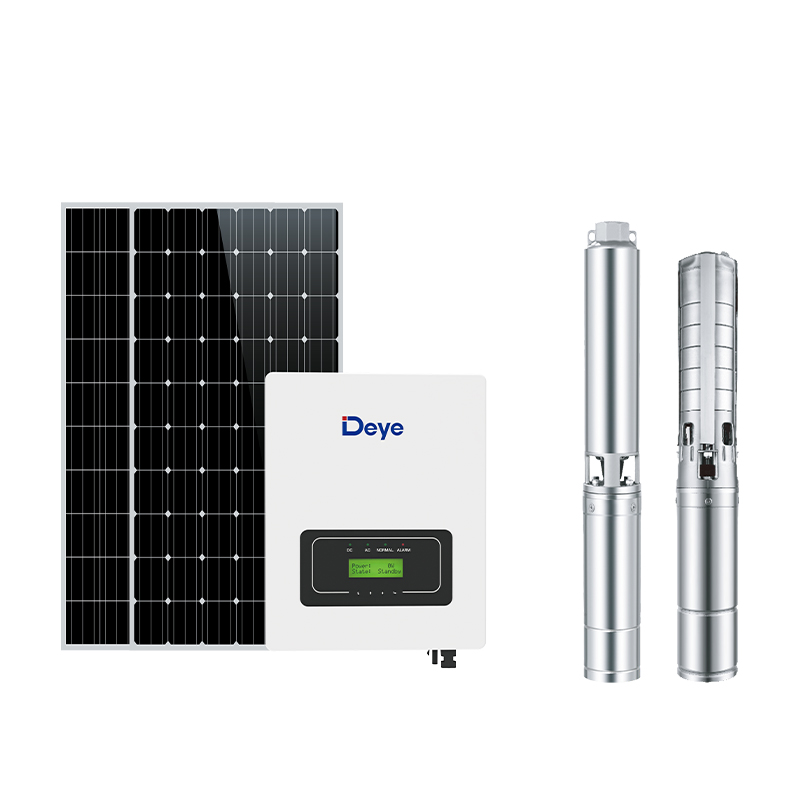
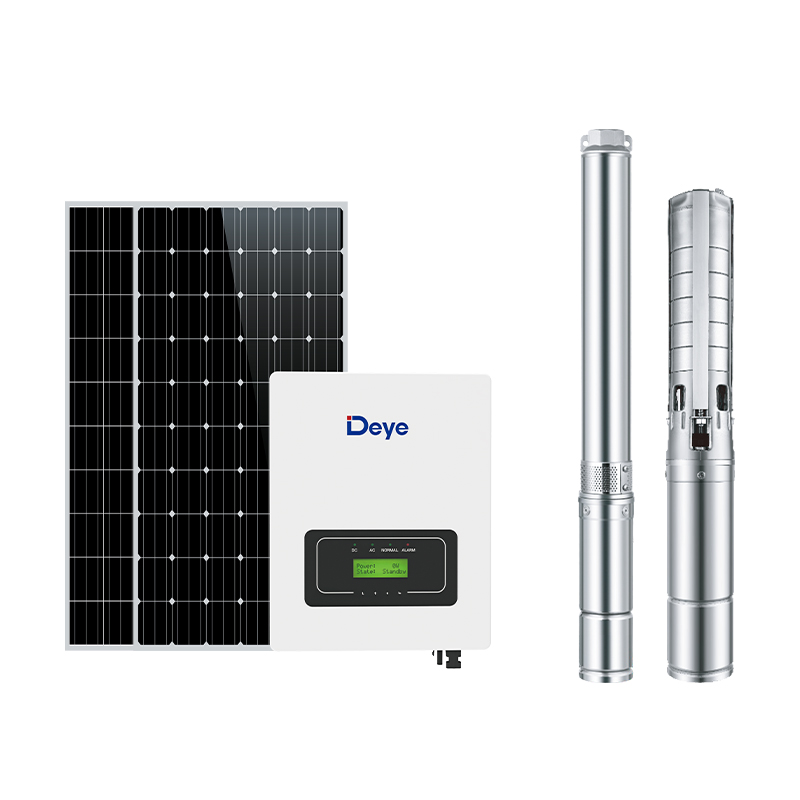
Introduction to DC Solar Water Pumps
Access to water is fundamental, whether for agricultural irrigation, livestock watering, or providing essential supply to remote homes. However, traditional pumping methods often rely on grid electricity or fossil fuels, which can be expensive, environmentally impactful, and unavailable in off-grid locations. This is where DC solar water pumps emerge as a revolutionary solution.
What are DC Solar Water Pumps?
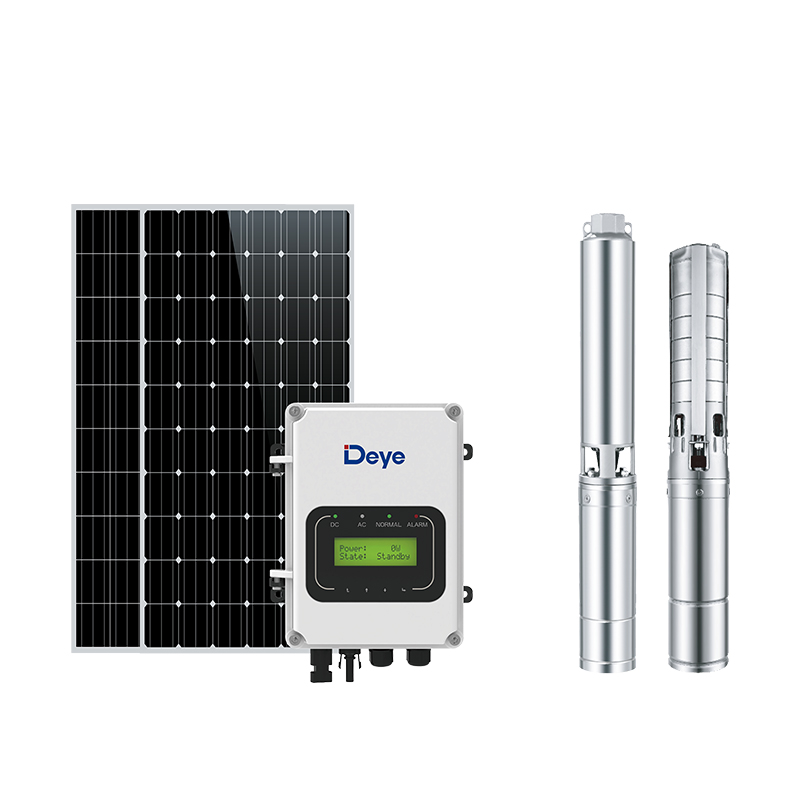
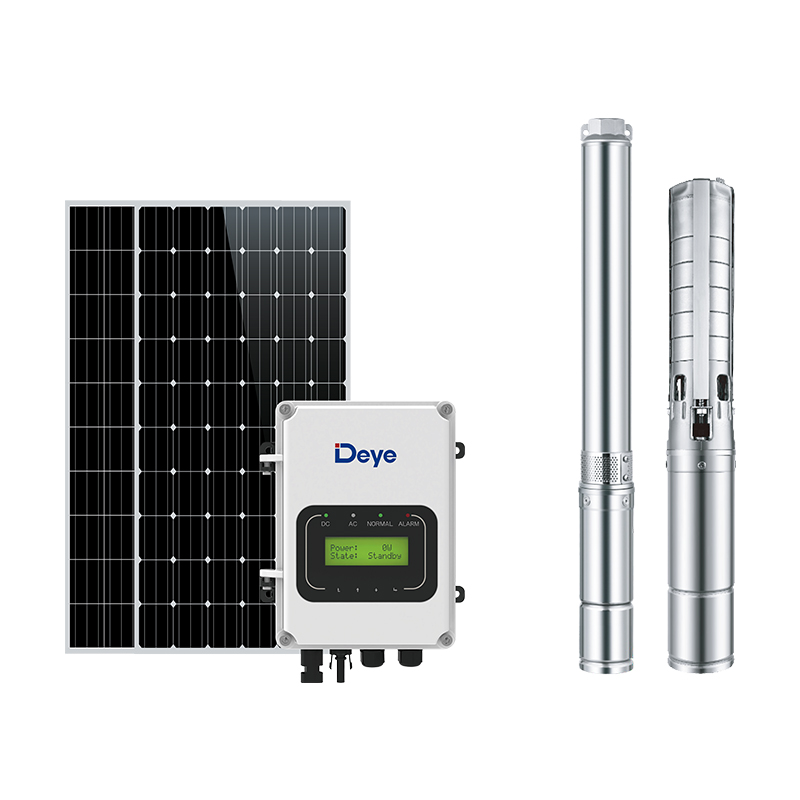
At its core, a DC solar water pump is a specialized water pump that operates directly on direct current (DC) electricity generated by solar panels. Unlike conventional pumps that require alternating current (AC) from the grid, DC solar pumps are designed to harness the sun's energy directly, making them ideal for areas without reliable grid access. They are a key component of off-grid water pumping systems, providing a sustainable and independent water supply.
How do they work? (Basic principle of converting solar energy to pump water)
The working principle of a DC solar water pump is remarkably straightforward yet highly effective. The journey begins with solar panels, which are comprised of photovoltaic (PV) cells. When sunlight strikes these cells, it excites electrons, generating a DC electrical current. This DC electricity is then fed directly to the DC water pump.
Often, a pump controller (sometimes incorporating an inverter for AC pumps, though for DC pumps it primarily regulates power) is integrated into the system. This controller acts as the brain, optimizing the power transfer from the solar panels to the pump. For DC solar water pumps, the direct current from the panels directly drives the pump's motor, causing it to draw water from its source (such as a well, borehole, pond, or stream) and push it through a pipe system to its intended destination, be it a storage tank, irrigation lines, or a faucet. The more intense the sunlight, the more power generated, and consequently, the more water the pump can move, making it an inherently solar-powered irrigation or water supply solution.
Benefits of using DC Solar Water Pumps
The adoption of DC solar water pumps offers a myriad of advantages that make them a superior choice for a variety of water pumping needs, particularly in off-grid or remote settings.
Cost savings (reduced or eliminated electricity bills): One of the most significant benefits is the substantial reduction, or complete elimination, of ongoing energy costs. Once installed, solar water pumps draw their power directly from the sun, meaning no more monthly electricity bills for pumping water. For those relying on diesel or gasoline generators, the savings on fuel costs are even more dramatic, leading to a rapid return on investment.
Environmentally friendly (renewable energy source): By harnessing solar power, a clean and inexhaustible renewable energy source, DC solar water pumps significantly reduce carbon emissions and reliance on fossil fuels. This contributes to a healthier planet and a more sustainable approach to water management, aligning with global efforts to combat climate change.
Reliability in remote locations (off-grid capability): For farms, rural communities, or remote homesteads far from the main power grid, DC solar water pumps provide an unparalleled level of reliability. They operate independently, ensuring a consistent water supply even in areas where traditional power infrastructure is non-existent or unreliable. This off-grid capability is crucial for sustained agricultural operations and essential living.
Low maintenance: Compared to fuel-powered pumps that require regular fueling, oil changes, and engine tune-ups, solar water pump systems are remarkably low-maintenance. The primary components, solar panels and the pump itself, are designed for durability and long lifespans with minimal intervention, typically only requiring occasional cleaning of the panels and checks of connections.
Types of DC Solar Water Pumps
DC solar water pumps are broadly categorized into two main types based on their installation method and the depth of the water source: submersible pumps and surface pumps. The choice between these two largely depends on the specific application, the depth of the water source, and the required water volume and pressure.
Submersible Pumps
Submersible pumps are designed to be fully immersed in the water source, typically a well or borehole pump. The motor and pump are housed in a sealed, watertight unit that is lowered directly into the water.
Ideal applications: They are best suited for deep wells, boreholes, and applications where the water level is significantly below ground, requiring water to be lifted from considerable depths. This makes them perfect for rural water supply and deep well irrigation.
Advantages:
High Head Capability: Excellent for lifting water from deep sources with high vertical lift requirements.
Less Priming Issues: Since they are submerged, they don't require priming (filling the pump with water to create suction) like surface pumps do.
Quiet Operation: Being underwater, their operation is virtually silent.
Efficient for Deep Wells: More energy-efficient for deep water pumping compared to trying to draw water with a surface pump from afar.
Disadvantages:
More Complex Installation: Installation can be more involved as it requires specialized equipment to lower the pump into the well.
Difficult Maintenance/Repair: If maintenance or repair is needed, the pump must be retrieved from the well, which can be challenging.
Higher Initial Cost: Generally, submersible pumps tend to be more expensive upfront than surface pumps of comparable capacity.
Surface Pumps
Surface pumps are installed on dry land, above the water source. They draw water up through a suction pipe and then push it to the desired location.
Ideal applications: These pumps are ideal for drawing water from shallow wells, ponds, streams, rivers, or tanks where the water source is within approximately 20-25 feet (6-7 meters) of the pump. They are commonly used for agricultural surface irrigation, transferring water between tanks, or for low-head applications.
Advantages:
Easier Installation and Maintenance: Being on the surface, they are much simpler to install, access, and maintain.
Lower Initial Cost: Generally less expensive than submersible pumps.
Versatility: Can be easily moved between different water sources if needed.
Disadvantages:
Limited Suction Lift: Cannot draw water from very deep sources due to atmospheric pressure limitations.
Requires Priming: Often need to be primed before operation to create the necessary suction, which can be a recurring task.
Noise: Can be noisier in operation compared to submerged pumps.
Susceptible to Weather: More exposed to environmental elements, which can affect lifespan if not properly protected.
Considerations for choosing the right type of pump based on water source and depth
The primary factors influencing your choice between a submersible and a surface pump are the depth of your water source and the distance the water needs to be transported (both vertically and horizontally).
If your water source is a deep well or borehole (more than 25 feet/7 meters deep), a submersible pump is almost always the correct choice due to its high head capabilities.
If your water source is a pond, stream, river, or a shallow well (less than 25 feet/7 meters deep), a surface pump will be more practical and cost-effective.
Consider the quality of the water as well; some submersible pumps are designed to handle dirty water better than certain surface pumps.
|
Feature |
DC Solar Submersible Pump |
DC Solar Surface Pump |
|
Installation |
Submerged in water (well, borehole) |
On dry land, above water source |
|
Ideal Depth |
Deep wells, boreholes (generally >25 ft/7m) |
Shallow wells, ponds, streams (generally <25 ft/7m suction lift) |
|
Head Capability |
High (can lift water from great depths) |
Low to moderate (limited by suction lift) |
|
Priming |
Not required (self-priming) |
Often required |
|
Noise |
Very quiet (underwater) |
Can be noisy |
|
Maintenance |
More challenging (requires retrieval) |
Easier (easily accessible) |
|
Initial Cost |
Generally higher |
Generally lower |
|
Typical Use |
Rural water supply, deep well irrigation, borehole pump |
Agricultural surface irrigation, water transfer, shallow well pumping |
|
Durability |
Often designed for continuous, harsh use |
Can be less robust if exposed to elements |
Components of a DC Solar Water Pump System
A complete DC solar water pump system is more than just a pump; it's an integrated solution comprising several key components that work in harmony to convert sunlight into pumped water. Understanding each component's role is vital for proper selection, installation, and maintenance.
Solar Panels
The heart of any solar power system, solar panels (also known as photovoltaic or PV modules) are responsible for converting sunlight into DC electricity.
Types of solar panels (monocrystalline, polycrystalline):
Monocrystalline Solar Panels: These panels are made from a single, pure silicon crystal. They are typically black and are known for their high efficiency (converting a larger percentage of sunlight into electricity) and sleek appearance. Monocrystalline panels perform well in low-light conditions and have a longer lifespan, making them a premium choice. However, they are generally more expensive per watt.
Polycrystalline Solar Panels: Composed of multiple silicon crystals melted together, polycrystalline panels have a blue, speckled appearance. While slightly less efficient than monocrystalline panels, they are more affordable to manufacture. They perform well in standard sunlight conditions and offer a good balance of cost and performance, making them a popular choice for many solar water pump applications.
Sizing and wattage considerations: The total wattage of your solar panels must be carefully sized to meet the power requirements of your DC water pump. This involves considering the pump's operating voltage and current, as well as the peak sunlight hours available in your location. Oversizing the panels slightly can ensure adequate power even on cloudy days, while undersizing will lead to reduced pump performance. The panels are typically connected in series to achieve the required voltage for the pump or in parallel to increase the current (and thus, power).
Pump Controller/Inverter
The pump controller is the brain of the solar pumping system. While some solar water pumps might be simple "direct drive" systems where the panels connect straight to the pump, most efficient and reliable setups utilize a controller. For DC solar water pumps, the controller's primary function is to optimize power flow.
Function of the controller (regulating voltage, protecting the pump):
Voltage Regulation: Solar panel output can fluctuate with sunlight intensity. The controller stabilizes the voltage supplied to the pump, ensuring it operates within its safe and efficient range, preventing damage from over or under-voltage.
Pump Protection: Modern controllers offer critical protection features, including:
Dry-run protection: Shuts off the pump if the water level in the source (well, tank) drops too low, preventing damage from running dry.
Overload protection: Guards against excessive current draw, which could damage the pump motor.
Over-voltage/Under-voltage protection: Prevents damage from voltage fluctuations.
Reverse polarity protection: Protects against incorrect wiring.
MPPT (Maximum Power Point Tracking) technology: Many advanced pump controllers incorporate MPPT technology. This intelligent feature continuously tracks the "maximum power point" of the solar panels – the specific voltage and current combination at which the panels produce their highest power output. By constantly adjusting the electrical load to match this point, an MPPT controller can significantly increase the overall efficiency of the system, extracting up to 10-30% more power from the solar panels, especially during varying light conditions (e.g., cloudy weather or at dawn/dusk). This means more water pumped with the same number of panels.
DC Water Pump
The pump itself is the device that physically moves the water. As discussed earlier, these can be submersible pumps or surface pumps, operating directly on DC power.
Pump specifications (flow rate, head):
Flow Rate: Measured in gallons per minute (GPM) or liters per hour (LPH), this indicates the volume of water the pump can deliver over a certain period. Your required flow rate will depend on your specific water needs (e.g., how much water is needed for irrigation, livestock, or household use per day).
Head: This refers to the vertical distance the pump can lift water and the pressure it can generate. It's typically measured in feet (ft) or meters (m) of "total dynamic head" (TDH), which includes vertical lift, friction losses in pipes, and any required pressure at the discharge point.
Materials (corrosion resistance): The materials used in the pump's construction are crucial for its longevity, especially when pumping water that may contain minerals or sediment. Look for pumps made with corrosion-resistant materials such as stainless steel, bronze, or high-grade plastics, particularly for submersible pumps that are constantly immersed.
Wiring and Protection
Proper wiring and protection are non-negotiable for the safe and efficient operation and longevity of your DC solar water pump system.
Importance of proper wiring and grounding:
Proper Wiring: Using the correct gauge (thickness) of wire for the current and distance involved minimizes voltage drop and heat buildup, ensuring efficient power delivery from the solar panels to the controller and pump. Loose or undersized wiring can lead to poor performance, energy loss, and even fire hazards.
Grounding: A robust grounding system is paramount for safety. It provides a safe path for fault currents to dissipate into the earth, protecting equipment from lightning strikes and preventing electrical shock hazards for anyone interacting with the system. All metallic components of the solar array (panel frames, mounting structures), the controller enclosure, and the pump should be properly grounded.
Fuses and circuit breakers: These are essential safety devices that protect the electrical components from overcurrents, short circuits, and surges.
Fuses: Single-use devices that contain a wire designed to melt and break the circuit when current exceeds a safe level. They provide fast protection.
Circuit Breakers: Reusable electrical switches that automatically trip (open) when an overcurrent or short circuit is detected. They can be reset after the fault is cleared.
How to Select the Right DC Solar Water Pump
Choosing the optimal DC solar water pump system is paramount to ensuring efficient and reliable water delivery. It requires a careful assessment of your water needs, the characteristics of your water source, and the environmental conditions. Skipping any of these steps can lead to an undersized, oversized, or poorly performing system.
Assessing Water Needs
The first step is to accurately determine how much water you need on a daily basis. This will directly influence the required flow rate of your pump.
Daily water requirements (gallons per day): Consider all uses for the pumped water:
Agricultural Irrigation: Calculate the water needed per acre/hectare for your specific crops, considering soil type, climate, and irrigation method (drip, sprinkler, flood).
Livestock Watering: Estimate the daily water consumption for each type and number of animals.
Rural Water Supply: Factor in household consumption for drinking, cooking, bathing, and cleaning, as well as any garden or minor livestock needs.
Other Uses: Consider any other specific demands like pond filling, construction, etc.
Tip: It's often helpful to look at historical water usage if available, or consult agricultural extension services for typical water requirements in your region.
Peak demand periods: Identify when your water consumption is highest. Do you need a large volume of water in a short period for irrigation during hot summer months? Or is there a consistent daily demand? This helps determine if you need a pump that can handle high peak flow, or if a smaller, continuous flow pump coupled with a storage tank would be more suitable.
Calculating Total Dynamic Head (TDH)
This is perhaps the most crucial calculation for sizing any water pump. Total Dynamic Head (TDH) is the total equivalent height that the pump must lift water. It accounts for both the vertical lift and the energy lost due to friction in the pipes.
Vertical lift: This is the actual physical height difference from the lowest water level in your source (e.g., the bottom of a well or pond) to the highest point of discharge (e.g., the top of a storage tank or the highest sprinkler head).
Friction losses in pipes: As water flows through pipes, fittings (elbows, tees, valves), and changes in pipe diameter, it encounters resistance, leading to pressure loss due to friction. The longer the pipe, the smaller its diameter, and the more fittings, the greater the friction loss. You'll need to consult friction loss tables (available online or in plumbing handbooks) for various pipe materials and diameters to accurately estimate this.
Pressure requirements: If you need a specific pressure at the discharge point (e.g., for sprinklers, which require a certain PSI/bar to operate effectively), this pressure needs to be converted into an equivalent "head" and added to your total dynamic head calculation.
Formula for converting PSI to feet of head: Feet of Head=PSI×2.31
Formula for converting bar to meters of head: Meters of Head=Bar×10.2
Summing it up: TDH=Vertical Lift+Friction Losses+Pressure Head
Sizing the Pump and Solar Panels
Once you have your daily water requirements and your calculated TDH, you can begin to size the system components.
Matching pump specifications to TDH and water needs: Look for pump performance curves provided by manufacturers. These charts show the pump's flow rate at various heads. You need to find a pump that can deliver your required daily water volume (flow rate) at your calculated TDH. Ensure the pump's maximum head capability exceeds your TDH, and its flow rate at that TDH meets your needs.
Determining the number of solar panels required: This depends on the pump's power consumption (watts) and the amount of peak sunlight hours available in your location.
Pump Power (Watts): This is usually listed in the pump's specifications.
Sunlight Hours (Peak Sun Hours): This is the equivalent number of hours per day when sunlight intensity averages 1000 watts per square meter. This varies by geographic location and time of year. You can find this data from solar insolation maps or resources like PVWatts calculator.
The voltage of your panels (in series) must match the operating voltage range of your pump controller and DC water pump.
It's generally recommended to provide slightly more wattage than the pump's maximum requirement to account for less-than-ideal conditions, panel degradation over time, and to allow the MPPT controller to operate efficiently.
Considering a battery bank (optional): For applications requiring water flow during non-sunlight hours (night, heavily overcast days), a battery bank can store excess solar energy. This adds complexity and cost but provides 24/7 water availability. This would typically involve an additional charge controller and inverter (if the pump is AC, but for DC pumps, the pump controller might have battery input capabilities). For simplicity and cost-effectiveness, most DC solar water pump systems rely on direct sun and a storage tank for nighttime water.
Installation Guide for DC Solar Water Pumps
Proper installation is critical for the long-term performance, efficiency, and safety of your DC solar water pump system. While specific steps may vary slightly depending on the pump model and site conditions, the following outlines the general process and vital precautions. For complex installations, consulting with a licensed electrician or solar professional is highly recommended.
Step-by-step installation process
Site Preparation and Planning:
Panel Location: Choose an area for your solar panels that receives maximum unobstructed sunlight throughout the day, ideally facing true south (in the Northern Hemisphere) or true north (in the Southern Hemisphere). Avoid areas prone to shading from trees, buildings, or other obstructions at any time of day.
Pump Location: For surface pumps, choose a stable, level, and accessible location close to the water source, protected from direct weather if possible. For submersible pumps, ensure the well or borehole is clear and the depth is known.
Pipe Routing: Plan the shortest and most efficient pipe route from the pump to your storage tank or distribution point, minimizing bends and vertical lifts to reduce friction losses.
Safety Zone: Ensure adequate space around the system components for installation, maintenance, and ventilation.
Mounting Solar Panels:
Mounting Structure: Install a robust mounting structure for your solar panels. Options include:
Ground Mounts: Fixed-tilt frames or adjustable mounts driven into the ground or set on concrete footings. These offer flexibility for optimal tilt and orientation.
Pole Mounts: A single sturdy pole supporting multiple panels, often used for smaller systems.
Roof Mounts: If suitable, panels can be mounted on a sturdy roof structure.
Orientation and Tilt: Angle the panels to maximize annual sunlight capture based on your latitude. Adjustable mounts allow seasonal optimization, which can significantly boost performance. Securely fasten the panels to the racking system according to manufacturer instructions, ensuring they can withstand local wind and snow loads.
Wiring the System:
Panel Wiring: Connect the solar panels in series, parallel, or a combination, as specified by the pump controller's voltage and current requirements. Pay close attention to polarity (+/-). Use appropriate solar-rated DC cabling (e.g., PV wire) designed for outdoor use and UV resistance.
Controller Connection: Connect the solar panel array's positive and negative leads to the designated solar input terminals on the pump controller.
Pump Connection: Connect the DC water pump's power cables to the pump output terminals on the controller. Ensure color-coding or labeling is consistently followed, especially for 3-phase DC pumps, to ensure correct motor rotation. For submersible pumps, this often involves a waterproof splice kit to connect the pump cable to the drop cable going down the well.
Sensor Wiring (if applicable): If using a dry-run sensor (low water level in well) or tank full sensor, connect their wires to the appropriate terminals on the controller.
Cable Management: Secure all wiring using UV-resistant cable ties or conduits to prevent damage from abrasion, pests, or weather. Label wires clearly.
Installing the Pump (Submersible or Surface):
Submersible Pump:
Attach a safety rope or stainless steel cable to the pump's designated lifting eye; never rely on the electrical cable to support the pump's weight.
Connect the drop pipe to the pump outlet.
Carefully lower the pump into the well or borehole, ensuring the cable and safety rope are secured as it descends. Position the pump at the recommended depth, typically several feet above the bottom to avoid sediment, and above he dry-run sensor (if separate).
Secure the well cap/seal with conduit for the wires and pipe.
Surface Pump:
Place the pump on a stable, level surface, typically a concrete pad, to minimize vibration and protect it from elements.
Connect the suction pipe from the water source to the pump's inlet. Ensure the suction pipe is airtight to prevent air leaks, which can cause the pump to lose prime.
Connect the discharge pipe to the pump's outlet.
For some surface pumps, you may need to manually prime the pump before the first use by filling it with water.
Connecting to Water Source and Storage:
Pipe Connections: Use appropriate fittings and sealants to ensure all pipe connections are watertight and leak-free.
Check Valve: Install a check valve in the discharge line (especially important for submersible pumps) to prevent water from flowing back into the well or pump when it shuts off, which can cause water hammer and damage.
Storage Tank (if used): Connect the discharge pipe to your storage tank. If using a tank, consider incorporating a float switch or level sensor to signal the pump controller to turn off when the tank is full, preventing overflow and wasted energy.
Initial System Startup and Testing:
Double-Check All Connections: Before powering on, meticulously inspect all electrical connections, wire routing, and plumbing connections.
Verify Grounding: Ensure all metallic components are properly grounded.
Power On: Activate the breakers or switches in the correct sequence (typically solar array first, then controller, then pump).
Monitor Performance: Observe the pump's operation. Check for water flow, proper pressure, and listen for any unusual noises. Monitor the pump controller display for diagnostic information or error codes.
Safety Precautions
Working with electricity and water demands strict adherence to safety protocols.
Electrical Safety (working with DC voltage):
Always De-Energize: Before performing any wiring or maintenance, ensure all power sources (solar panels, and any batteries) are disconnected and de-energized. Cover solar panels with opaque material or disconnect them at the combiner box to prevent power generation.
Lockout/Tagout: Implement lockout/tagout procedures to prevent accidental re-energization.
Personal Protective Equipment (PPE): Wear appropriate PPE, including insulated gloves, safety glasses, and non-conductive footwear.
Tool Insulation: Use insulated tools when working with electrical components.
Voltage Awareness: DC voltage from solar panels can be high, even from a few panels, and can cause severe shock. Treat all electrical components as live.
Proper Wire Sizing: Use correct wire gauges to prevent overheating and voltage drop.
Professional Help: If you are unsure about any electrical work, always hire a qualified and licensed electrician.
Water Safety (contamination prevention):
Cleanliness: Maintain cleanliness throughout the installation process, especially when working with well components or pipes that will carry potable water.
Sanitation: Ensure all tools, pipes, and pump components that come into contact with the water source are clean and sanitized before installation.
Wellhead Protection: Ensure the well casing extends above ground level (typically at least 12 inches/30 cm) and is properly sealed with a watertight well cap to prevent surface runoff or contaminants from entering the well. The area around the wellhead should slope away from the casing.
Disinfection: After installing a pump in a well for potable water, it is highly recommended to shock chlorinate the well to kill any bacteria introduced during the installation process. Follow local guidelines for disinfection and subsequent testing.
Backflow Prevention: Consider installing backflow prevention devices, especially if connecting to a municipal water supply or shared system, to prevent contamination.
Maintenance and Troubleshooting
Even the most robust DC solar water pump system requires periodic attention to ensure its optimal performance and longevity. Regular maintenance can prevent minor issues from escalating into costly repairs, while understanding basic troubleshooting steps empowers users to quickly address common problems.
Regular maintenance tasks
Proactive maintenance is the cornerstone of a reliable solar pumping system. Establish a routine based on the following:
Cleaning solar panels:
Why: Dust, dirt, bird droppings, leaves, and other debris can accumulate on the surface of solar panels, reducing the amount of sunlight reaching the photovoltaic cells and consequently lowering power output. Even partial shading from a single leaf can significantly reduce the output of an entire panel string.
How: Periodically (weekly, monthly, or quarterly depending on your environment, or after heavy dust/bird activity) clean the panel surfaces with a soft cloth or sponge and plain water. Avoid abrasive cleaners or harsh scrubbing that could scratch the glass. Clean early in the morning or late in the afternoon when panels are cool to prevent thermal shock and water spotting.
Checking wiring connections:
Why: Vibrations, temperature fluctuations, and environmental exposure can cause electrical connections to loosen or corrode over time, leading to resistance, voltage drop, and potential safety hazards.
How: Regularly (e.g., quarterly or biannually) visually inspect all wiring, including connections at the solar panels, pump controller, and DC water pump. Ensure all terminals are tight and free from corrosion. Look for any signs of fraying, cracking, or damage to insulation. Ensure conduits are secure and preventing rodent or UV damage. Always ensure the system is completely de-energized before checking electrical connections.
Inspecting the pump:
Why: The pump is a mechanical device with moving parts that are susceptible to wear, debris, and potential blockages.
How:
Surface Pumps: Visually inspect for leaks around seals and fittings. Clear any debris from the intake screen and impeller area. Listen for unusual noises or vibrations, which can indicate bearing wear or an unbalanced impeller.
Submersible Pumps: While direct visual inspection is difficult, monitor flow rate and pressure. If these decline significantly, it could indicate a clogged intake screen or impeller. If the well has a history of sand or sediment, consider pulling the pump periodically for inspection and cleaning, though this is a more involved task.
Check Valves: Ensure any in-line check valves are functioning correctly and not stuck open or closed.
Monitoring water levels and quality:
Why: Running a pump dry (without water) is one of the quickest ways to damage it, especially for pumps not designed for dry-run protection. Poor water quality (e.g., high sediment, corrosive elements) can accelerate wear.
How: If your system doesn't have an automatic low-water cutoff, regularly check the water level in your well, pond, or tank, especially during dry seasons. For submersible pumps, ensure the low-level sensor is correctly positioned and functional. If pumping from a dirty source, consider pre-filtration to protect the pump.
Troubleshooting common problems
When issues arise, a systematic approach to troubleshooting can help identify and resolve them efficiently.
Pump not starting:
No Sunlight: Is it night, heavily overcast, or are the panels shaded? The pump won't run without adequate sunlight.
Dirty Solar Panels: Clean the panels thoroughly.
Loose/Damaged Wiring: Check all electrical connections for tightness and integrity. Look for frayed wires or signs of corrosion.
Controller Error: Check the pump controller's display for any error codes (e.g., dry-run, over-voltage, under-voltage, overload). Consult the controller's manual for specific error code meanings.
Low Water Level: If a low-water sensor is installed, ensure there's enough water in the source. The pump may have shut off automatically.
Blown Fuse/Tripped Breaker: Check any fuses or circuit breakers in the system (between panels and controller, and controller and pump). Replace fuses or reset breakers as needed after identifying and fixing the underlying cause of the overcurrent.
Faulty Pump/Controller: If all other checks pass, the pump motor or controller itself might be faulty, requiring professional diagnosis or replacement.
Low water flow:
Insufficient Sunlight: The sun isn't strong enough. Flow rate will naturally be lower during cloudy periods, early morning, or late afternoon.
Dirty Solar Panels: Clean them.
Partial Panel Shading: Even a small shadow on one cell can significantly reduce power output. Clear obstructions.
Clogged Intake/Filter: The pump's intake screen or any in-line filters might be partially blocked by sediment, algae, or debris. Clean them.
Pipe Obstruction/Leak: Check for blockages in the pipes or significant leaks in the piping system that are reducing pressure and flow.
Pump Wear: Over time, the pump's impeller or internal components may wear out, leading to reduced efficiency.
Incorrect Sizing: The pump might be undersized for the TDH or water requirements, especially if initial calculations were off.
Voltage issues:
Low Voltage (Pump not running or running slowly): This typically points to insufficient power from the solar panels (dirty, shaded, too few panels for the pump's requirements) or significant voltage drop due to undersized or long wiring.
High Voltage (Controller tripping): While less common with properly sized systems, excessive voltage from the panels (e.g., if too many panels are connected in series for the controller's max input) can cause the controller to shut down to protect the pump.
Check wiring connections: Loose connections can manifest as voltage fluctuations.
MPPT Controller Issue: If equipped, ensure the MPPT controller is functioning correctly and tracking the maximum power point.
Extending the lifespan of your DC solar water pump
Beyond regular maintenance, several practices can significantly prolong the operational life of your solar pumping system:
Proper Sizing: As discussed, a correctly sized system (pump, panels, controller) that operates within its optimal efficiency range will experience less stress and wear.
Avoid Dry Running: Ensure your water source never completely depletes while the pump is running. Utilize dry-run protection sensors or set your pump intake at an appropriate level.
Protect from Elements: Shield surface pumps from direct sunlight, extreme temperatures, and heavy precipitation. Ensure solar panels are securely mounted to withstand local weather conditions.
Water Quality Management: If pumping abrasive water (high sand content), consider a pump designed for such conditions or implement pre-filtration. For corrosive water, ensure pump materials are suitable.
Quality Components: Investing in high-quality DC water pumps, solar panels, and pump controllers from reputable manufacturers generally leads to greater durability and longer service life.
Professional Installation: While DIY is possible for simple systems, complex installations benefit immensely from professional expertise, ensuring all components are correctly integrated and safety standards are met.
